
Create and manage images
Before you can do anything else. You’ll need to create your images. The starting point is a reference image. The reference image is the standard operating system that you’ll deliver to your users. You’ll have to consider what you want to add to the image; for example, adding drivers, apps, or specific configurations.
Create a reference image
After you’ve determined what will be included in the image, you’ll need to create it. Use the following procedure:
- On a reference computer, install Windows 10.
- Apply any Windows updates.
- Add any drivers, apps, or other required software.
- Apply any app updates.
- Configure any installed apps or software as needed.
- Generalize the image.
Exam Tip
You use the Sysprep.exe program to generalize your image. It’s located in the C:\Windows\System32\Sysprep\ folder.
7. Capture the generalized image.
8. Store the captured image in a location accessible to MDT.
In addition to your operating system image, you’ll also need a boot image. Typically, you’ll use the boot image provided on the Windows 10 product DVD or ISO.
Need More Review? Create a Windows 10 Reference Image
To review further details about reference image creation, refer to the Microsoft website at https://docs.microsoft.com/windows/deployment/deploy-windows-mdt/create-a-windows-10-reference-image.
Add the images to MDT
After you’ve created any required images, the next step is to add the images to MDT. Before you can add images, you’ll need to create a deployment share. Use the following procedure:
- Open the Deployment Workbench.
- Select the Deployment Shares folder.
- Right-click Deployment Shares and then select New Deployment Share.
- Complete the New Deployment Share Wizard by providing the following:
- A local path on the MDT server for the share.
- A share name, such as Deployment Share$.
- A description.
- Options that control the deployment experience when images are applied:
- Ask if a computer backup should be performed.
- Ask for a product key.
- Ask to set the local Administrator password.
- Ask if an image should be captured.
- Ask if BitLocker should be enabled.
When you’ve created the deployment share, you can add your images to it.
To add an operating system image, use the following procedure:
- Expand your deployment share and select Operating Systems.
- Right-click Operating Systems and then select Import Operating System.
- Complete the Import Operating System Wizard, displayed in Figure 1-12, by entering the following information:
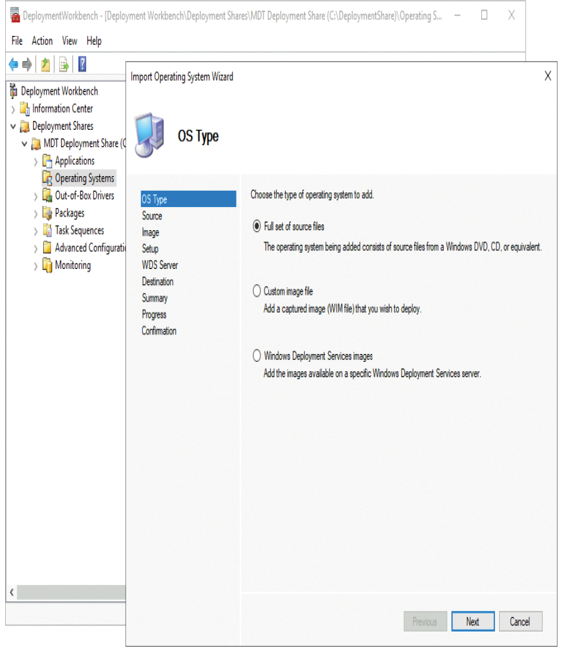
Figure 1-12 Choosing the operating system image type
- Choose between Full set of source files, Custom image file, and Windows Deployment Services image.
- The source location for your image.
- A WDS server name, if you’re using a Windows Deployment Services image.
- A destination directory name.